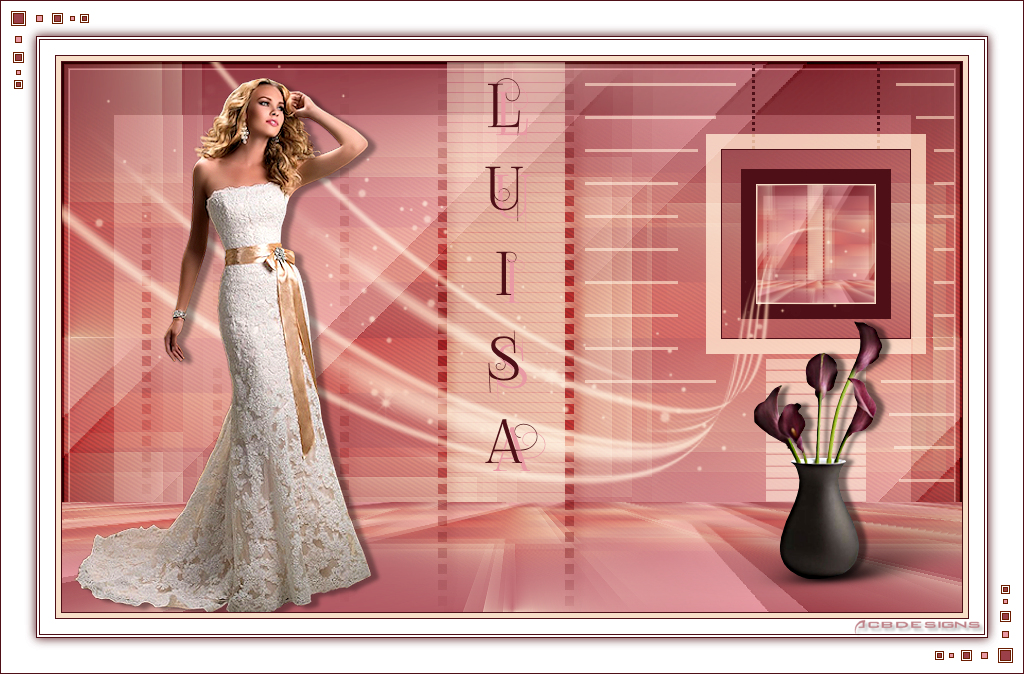
The tutorial:
******
01
Open a new Transparent image 900 X
550px
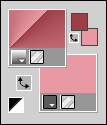
Fill the image with the Foreground
Gradient 
02
Effects - Texture Effects - Weave

03
Effects - Plugins - Filters Unlimited
- Unplugged Effects - Defocus

Adjust - Sharpness - Sharpen
04
Effects - Image Effects - Seamless
Tiling
05
Layers - Duplicate
Effects - Plugins - Mock - Windo

06
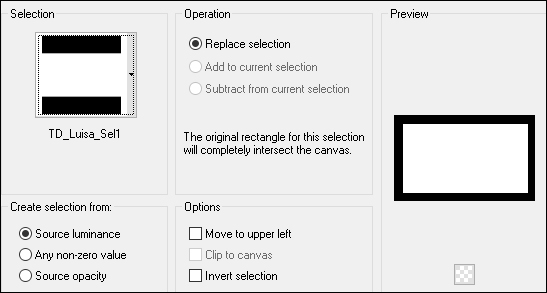
Selections - Load/Save - Load
Selection from Disk - "TD_Luisa_Sel1"
Press the Delete key on your keyboard
Selections - Select None
07
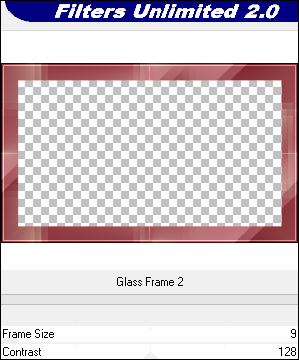
Effects - Plugins - Filters Unlimited
- Buttons and Frames - Glass Frame 2
Effects - Edge Effects - Erode
08
Change the Foreground Gradient back to
Color #9b3f48

Layers - New Raster Layer
Fill the Layer with #9b3f48
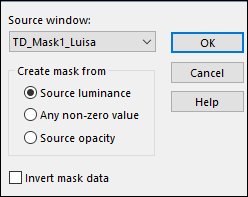
Layers - New Mask Layer - From Image -
"TD_Mask1_Luisa"
Layers - Merge - Merge Group
Change the Blend Mode to
Multiply
09
Layers - New Raster Layer
Fill the Layer with #d2ab8d

Layers - New Mask Layer - From Image -
"TD_Mask2_Luisa"

Layers - Merge - Merge Group
Change the Blend Mode to
Overlay
10
Layer Palette: Close the two
Middle Layers

Edit - Copy Special - Copy Merged
Edit - Paste - Paste As New Layer
11
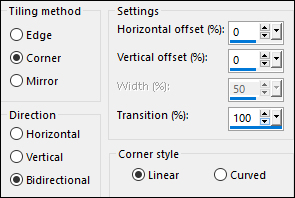
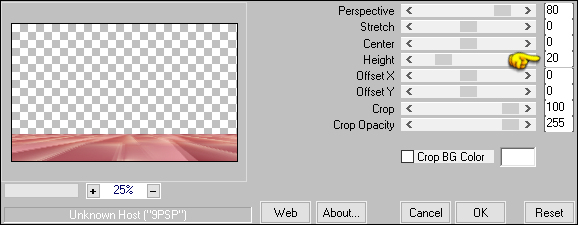
Effects - Plugins - MuRa's Meister -
Perspective Tiling
Open all Layers and continue on the Top one (Group Raster
2)
12
Layers - New Raster Layer
Selections Tool (S) - Custom Selection

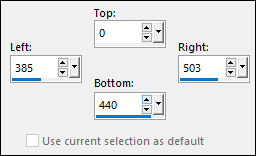
13
Flood Fiil Tool (F) Lower the Opacity
to 50 on the Toolbar

Fill the Selection with #f7dec9

Reset the Opacity to 100
Selections - Select None
14
Effects - Plugins - AP [Lines] - Lines
- SilverLining

15
Layers - Arrange - Move Down
Edit - Repeat Move Layer Down
Edit - Copy Special - Copy Merged
16
Click on the Top Layer
Layers - New Raster Layer
Fill the Layer with #4e1016
Layers - New Mask Layer - From Image -
"TD_Mask3_Luisa"
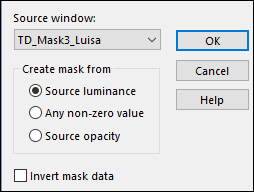
Layers - Merge - Merge Group
17
Magic Wand:

Select the inside of the frame
Edit - Paste - Paste Into Selection
Keep selected
18
Selections - Modify - Select Selection
Borders

Fill the Selection with #f7dec9
Selections - Select None
19
Layers - New Raster Layer
Fill the Layer with - #d2ab8d
Layers - New Mask Layer - From Image -
"TD_Mask4_Luisa"

Layers - Merge - Merge Group
Change the Blend Mode of this Layer to
Screen
20
Open "Deco_vase_arums_CibiBijoux"
from tray
Edit - Copy the Middle Layer
On your work image: Edit - Paste
- Paste As New Layer
Image - Resize - 75% - Resize All
Layers - not checked
Again:
Image - Resize - 75% - Resize All Layers - not checked
Image - Mirror - Mirror Horizontal
Pick Tool (K)

Enter these parameters for the X: and
Y: positions on the Toolbar
X: 692.00 Y:
259.00
Press M to close the
Pick Tool
21
Effects - Plugins - Xero - Clarity
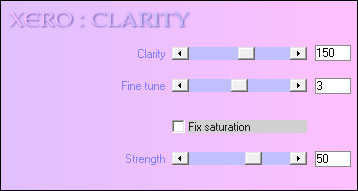
Note: This Step is
optional and will depend on the tube you are using
22
Effects - 3D Effects - Drop Shadow:
0/8/50/5 Color: #000000
Effects - Plugins - Alien Skin - Eye
Candy 5 - Impact - perspective Shadow - Preset -
"TD_Shadow_Luisa"
Note: If the Preset isn't working for
you, use these settings in the Basic Tab:
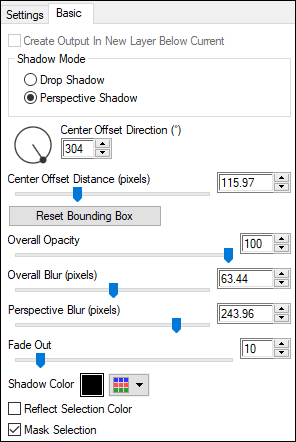
If the Shadow is too dark for your
tube, try adjusting the Fade Out slider
23
Open "TD_Texto_Luisa" from tray
Edit - Copy the Middle Layer
On your work image: Edit - Paste
- Paste As New Layer
Pick Tool (K)
Enter these parameters for the X: and
Y: positions on the Toolbar
X: 423.00 Y: 19.00
Press M to close the
Pick Tool
Effects - 3D Effects - Drop Shadow:
8/8/100/0 Color:
#e899a3 
24
Open "112_femme_animabelle_p4"
from tray (Or a tube of your choice)
Erase the watermark
Edit - Copy
On your work image: Edit - Paste
- Paste As New Layer
Image - Resize - 65% - Resize All
Layers - Not checked
Image - Resize - 85% - Resize All
Layers - Not Checked
Pick Tool (K)
Enter these parameters for the X: and
Y: positions on the Toolbar
X: 47.00 Y: 8.00
Press M to close the
Pick Tool
Adjust - Sharpness - Sharpen
(If you use your own tube: Move to the
Left as in the Example)
Optional> Adjust - Brightness
and Contrast - 20/10
Effects - 3D Effects - Drop Shadow: 3/8/50/0
Color:#000000
25
Image - Add Borders - Symmetric
checked - 1px - #4e1016

Image - Add Borders - Symmetric checked - 5px - #ffffff 
Image - Add Borders - Symmetric checked - 1px - #4e1016
ImImage - Add Borders - Symmetric checked - 15px - #ffffff
Image - Add Borders - Symmetric checked - 1px - #4e1016
Image - Add Borders - Symmetric checked - 2px - #ffffff
Image - Add Borders - Symmetric checked - 1px - #4e1016
26
Selections - Select All
Image - Add Borders - Symmetric
checked - 35px - #ffffff
Effects - 3D Effects - Drop Shadow:
0/0/60/15 Color:#4e1016
Edit - Repeat Drop Shadow
Selections - Select None
27
Open "TD_Deco_Luisa" from tray
Edit - Copy the Middle Layer
No need to move
Note: If you wish to
change the Color you can do so by using the Color
Changer or Color Replacer

Image - Add Borders - Symmetric checked - 1px - #4e1016
28