Please read my Terms (TOU) before doing the tutorial.
Thank you for putting a link to this tutorial by showing your realization on a website, forum or in an email!
With your result, you can make signatures, websets, incredimail letters, etc.
Please, credit to Tati Designs, thank you.
This tutorial is dedicated to Karin, as a thank you for translating my tutorials into Danish.
Materials
PSPX9 (you can use any version).
Download the tutorial material here:
Filters:
Mehdi / Wavy Lab 1.1 y Sorting Tiles (download here).
Simple / Top Bottom Wrap, Blintz y Top Left Mirror (download here).
VanDerLee / Unplugged-X / Defocus (download here).
L and K landksiteofwonders / L en K's Mayra (download here).
&<Bkg Designer sf10 I> / Cruncher (download here).**
L and K landksiteofwonders / L en K's Zitah (download here).
MuRa's Meister / Perspective Tiling (download here).
** Import this filter with "Unlimited".

IMPORTANT
It is forbidden to modify or rename files or remove the watermark.
Please do not use the material provided outside this tutorial.
Main tube by LB. A mask by Narah.
The rest of the material used in the tutorial is mine.

Preparation
Duplicate the tubes. Close the originals.
Install the Filters in the "Plugins" folder of your PSP.
In the "Selecciones" folder are 3 files, put them in the "Selections" folder of your PSP.
Colors
Choose colors in harmony with your tube.
This is the tutorial palette:

If you use other colors, you must play with the Blend Mode and the Opacity of the layers.

≈ Step 1 ≈
In your Materials palette:
Set your Foregroundcolor to (4) #78855b 
Set your Backgroundcolor to (2) #c82c2f 
≈ Step 2 ≈
Open a new transparent image of 900 x 550 pixels.
≈ Step 3 ≈
Effects / Plugins / Mehdi / Wavy Lab 1.1:
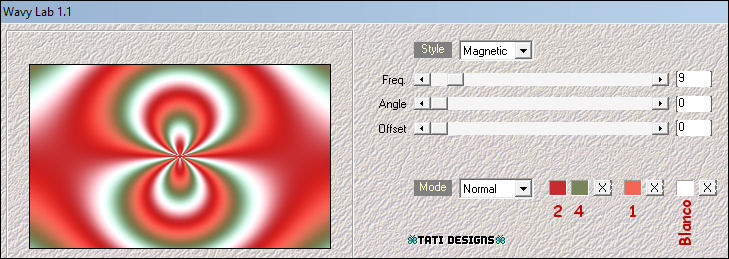
 #c82c2f |
 #78855b |
 #f36654 |
 #ffffff |
≈ Step 4 ≈
Effects / Plugins / Mehdi / Sorting Tiles:
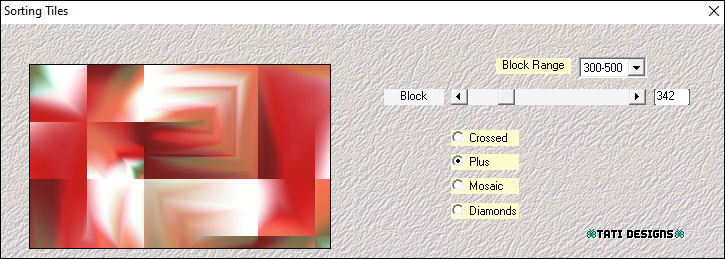
≈ Step 5 ≈
Layers / Duplicate.
≈ Step 6 ≈
Effects / Plugins / Simple / Top Bottom Wrap.
≈ Step 7 ≈
Lower the Opacity to 50.
≈ Step 8 ≈
Image / Mirror.
≈ Step 9 ≈
Layers / Merge / Merge Down.
≈ Step 10 ≈
Layers / Duplicate.
≈ Step 11 ≈
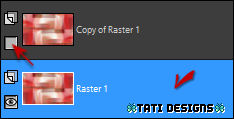
Close the visibility of the layer "Copy of Raster 1" and activate the Bottom Layer ("Raster 1"):
≈ Step 12 ≈
Effects / Plugins / Simple / Blintz: 2 times.

≈ Step 13 ≈
Layers / New Raster Layer and fill with the color (3) #820014 
≈ Step 14 ≈
Open the mask "TD_Mask_Karin" and return to your work.
≈ Step 15 ≈
Layers / New Mask Layer / Fron Image:
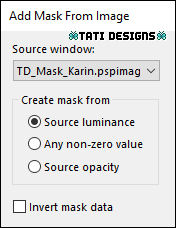
Layers / Merge / Merge Group.
≈ Step 16 ≈
Adjust / Sharpness / Sharpen.
≈ Step 17 ≈
Activate the Bottom Layer ("Raster 1").
≈ Step 18 ≈
Selections / Load/Save / Load Selection from Disk: choose "TD_Karin_Sel1":
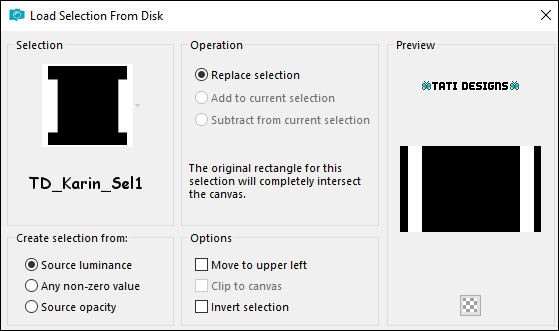
≈ Step 19 ≈
Selections / Promote Selection to Layer.
≈ Step 20 ≈
Selections / Select None.
≈ Step 21 ≈
Layers / Arrange / Move Up (on top of mask layer).
≈ Step 22 ≈
Effects / Plugins / VanDerLee / Unplugged-X / Defocus:
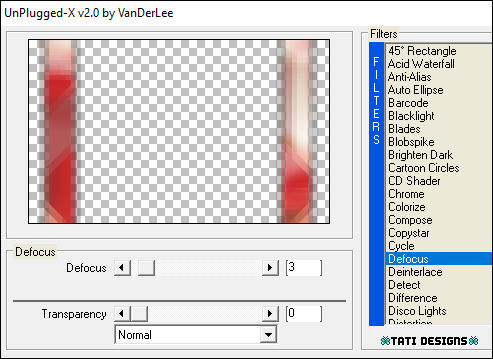
≈ Step 23 ≈
Effects / Plugins / L and K landksiteofwonders / L en K's Mayra (default):
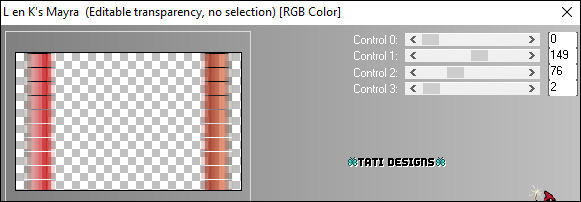
≈ Step 24 ≈
Layers / New Raster Layer and fill with the color #ffffff 
≈ Step 25 ≈
Open the mask "NarahsMasks_1544" and return to your work.
≈ Step 26 ≈
Layers / New Mask Layer / Fron Image:
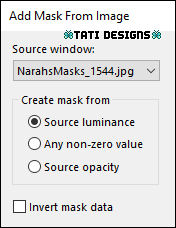
Layers / Merge / Merge Group.
≈ Step 27 ≈
Image / Mirror.
≈ Step 28 ≈
Change the Blend Mode to "Overlay".
≈ Step 29 ≈
Activate the Bottom Layer ("Raster 1").
≈ Step 30 ≈
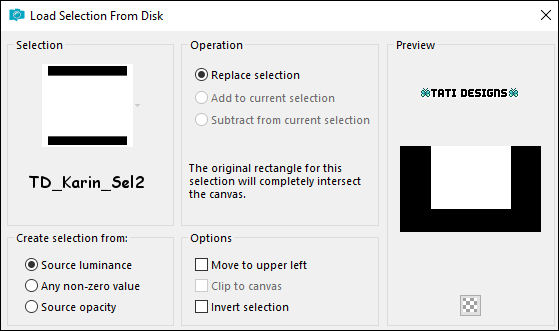
Selections / Load/Save / Load Selection from Disk: choose "TD_Karin_Sel2":
≈ Step 31 ≈
Selections / Promote Selection to Layer.
≈ Step 32 ≈
Selections / Select None.
≈ Step 33 ≈
Image / Mirror.
≈ Step 34 ≈
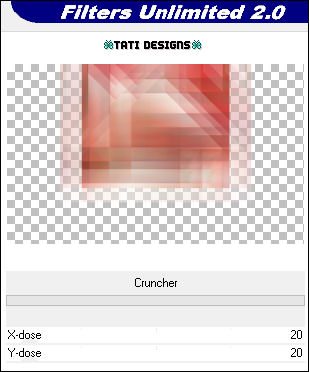
Effects / Plugins / Unlimited / &<Bkg Designer sf10 I> / Cruncher (default):
≈ Step 35 ≈
Change the Blend Mode to "Multiply".
≈ Step 36 ≈
Layers / Merge / Merge Down.
≈ Step 37 ≈
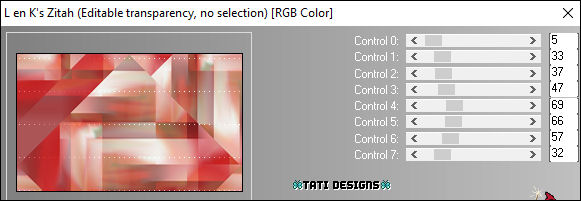
Effects / Plugins / L and K landksiteofwonders / L en K's Zitah (default):
≈ Step 38 ≈
Activate the Top Layer ("Copy of Raster 1") and open the visibility.
≈ Step 39 ≈
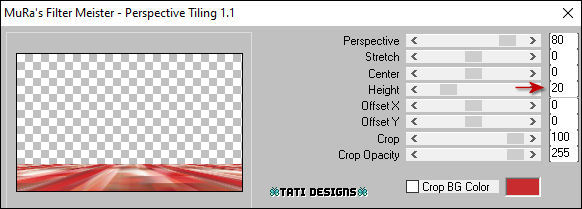
Effects / Plugins / MuRa's Meister / Perspective Tiling:
≈ Step 40 ≈
Effects / Edge Effects / Enhance.
≈ Step 41 ≈
Open the tube "TD_Deco1_Karin" and copy.
Return to your work and paste as new layer.
≈ Step 42 ≈
Activate Tool "Pick" (K) and modify the positions of X (187,00) and Y (32,00):

Press the "M" key to deactivate the "Pick" Tool.
≈ Step 43 ≈
To make your own decoration:
Layers / New Raster Layer.
Selections / Load/Save / Load Selection from Disk: choose "TD_Karin_Sel3":
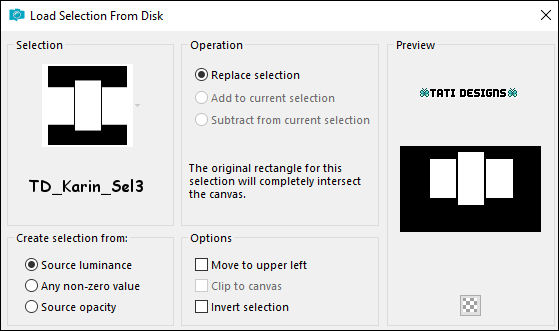
Fill the Selection with the color #ffffff 
Choose a nice flower background and copy.
Return to your work and paste as new layer.
Place well inside the selections.
Selections / Invert.
Press the "Delete" key on your keyboard.
Selections / Select None.
Lower the Opacity to 70.
Layers / Merge / Merge Down.
≈ Step 44 ≈
Effects / 3D Effects / Drop Shadow: 5 / 5 / 50 / 30 / Color: (3) #820014 
≈ Step 45 ≈
Open the tube "TD_Jarron_Karin" and copy.
Return to your work and paste as new layer.
≈ Step 46 ≈
Activate Tool "Pick" (K) and modify the positions of X (744,00) and Y (139,00):

Press the "M" key to deactivate the "Pick" Tool.
≈ Step 47 ≈
Effects / 3D Effects / Drop Shadow: 5 / 5 / 50 / 30 / Black 
≈ Step 48 ≈
Open the tube "TD_Petalos_Karin" and copy.
Return to your work and paste as new layer.
≈ Step 49 ≈
Activate Tool "Pick" (K) and modify the positions of X (481,00) and Y (439,00):

Press the "M" key to deactivate the "Pick" Tool.
≈ Step 50 ≈
Open the tube "2812 - woman - LB TUBES9" and copy.
Return to your work and paste as new layer.
≈ Step 51 ≈
Image / Resize: 80% ("Resize All Layers" - Not checked).
≈ Step 52 ≈
Activate Tool "Pick" (K) and modify the positions of X (13,00) and Y (7,00):

Press the "M" key to deactivate the "Pick" Tool.
≈ Step 53 ≈
Adjust / Sharpness / Sharpen.
≈ Step 54 ≈
Effects / 3D Effects / Drop Shadow: 0 / -10 / 50 / 30 / Black 
≈ Step 55 ≈
Open the tube "TD_Titulo_Karin" and copy.
Return to your work and paste as new layer.
≈ Step 56 ≈
Activate Tool "Pick" (K) and modify the positions of X (528,00) and Y (349,00):

Press the "M" key to deactivate the "Pick" Tool.
≈ Step 57 ≈
Image / Add Borders / Symmetric - 1 pixel / Color: (3) #820014 
Image / Add Borders / Symmetric - 3 pixels / Color: (2) #c82c2f 
Image / Add Borders / Symmetric - 1 pixel / Color: (3) #820014 
Image / Add Borders / Symmetric - 15 pixels / Color: #ffffff 
Image / Add Borders / Symmetric - 1 pixel / Color: (3) #820014 
Image / Add Borders / Symmetric - 5 pixels / Color: (2) #c82c2f 
Image / Add Borders / Symmetric - 1 pixel / Color: (3) #820014 
Image / Add Borders / Symmetric - 45 pixels / Color: #ffffff 
≈ Step 58 ≈
Open the tube "TD_Deco2_Karin" and copy.
Return to your work and paste as new layer.
≈ Step 59 ≈
Activate Tool "Pick" (K) and modify the positions of X (6,00) and Y (7,00):

Press the "M" key to deactivate the "Pick" Tool.
≈ Step 60 ≈
Effects / Plugins / Simple / Top Left Mirror.
≈ Step 61 ≈
Layers / New Raster Layer and add your name or watermark.
≈ Step 62 ≈
Image / Add Borders / Symmetric - 1 pixel / Color: (3) #820014 
≈ Step 63 ≈
Image / Resize: Width 950 pixels ("Resize All Layers" - Checked).
≈ Step 64 ≈
Adjust / Sharpness / Sharpen.
≈ Step 65 ≈
Export your work as an optimized .jpg file.
It's over!
I hope you liked it and enjoyed it.

.:. Another version of the tutorial with tubes by SuizaBella (woman) and Freepng (rose) .:.
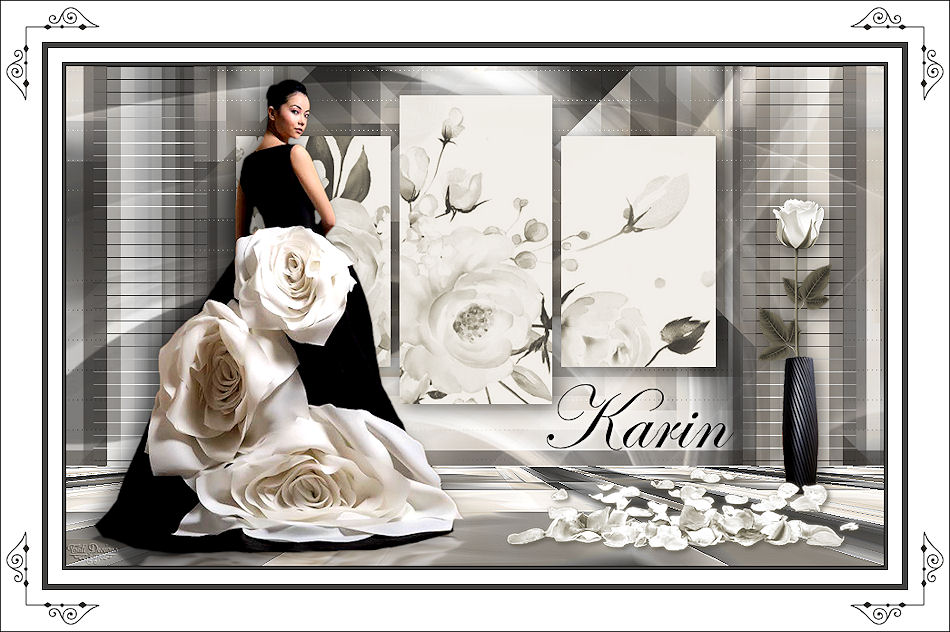

.:. If you want to send me your work with the result of this tutorial, contact me .:.

 .:. Here you can see other versions of the tutorial .:.
