Please read my Terms (TOU) before doing the tutorial.
Thank you for putting a link to this tutorial by showing your realization on a website, forum or in an email!
With your result, you can make signatures, websets, incredimail letters, etc.
Please, credit to Tati Designs, thank you.
Materials
PSPX9 (you can use any version).
Download the tutorial material here:
Filters:
Mehdi / Wavy Lab 1.1 y Sorting Tiles (download here).
Simple / 4 Way Average and Left Right Wrap (download here).
Italian Editors Effect / Effeto Fantasma (download here).
Carolaine and Sensibility / cs_texture (download here).
Mock / Windo (download here).
AFS Import / Sqborder2 (download here).
AP [Lines] / Lines - Silverlining (download here).
MuRa's Seamless / Emboss at Alpha (download here).

IMPORTANT
It is forbidden to modify or rename files or remove the watermark.
Please do not use the material I have created for this tutorial on another site.
The masks byAmparo Silva.
The rest of the material used in the tutorial is mine.

Preparation
Duplicate the tubes. Close the originals.
Install the Filters in the "Plugins" folder of your PSP.
Colors
Choose colors in harmony with your tube.
This is the tutorial palette:

If you use other colors, you must play with the Blend Mode and the Opacity of the layers.

≈ Step 1 ≈
In your Materials palette:
Set your Foregroundcolor to (3) #41403e 
Set your Backgroundcolor to (2) #d5cab9 
≈ Step 2 ≈
Open the file "TD_Canal_Alfa_Follow_that_Dream.pspimage". Duplicate and close the original.
(This will be the base of our work, which contains selections on the alpha channel.)
Rename the layer "Canal Alfa" as "Raster 1", "Trama 1", etc, depending on the language of your PSP.
≈ Step 3 ≈
Effects / Plugins / Mehdi / Wavy Lab 1.1:
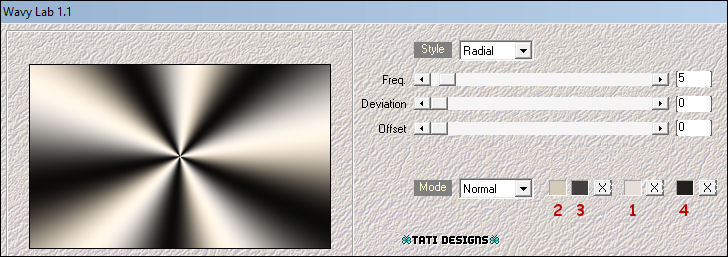
 #d5cab9 |
 #41403e |
 #e5dfd8 |
 #221f1c |
≈ Step 4 ≈
Effects / Plugins / Mehdi / Sorting Tiles:
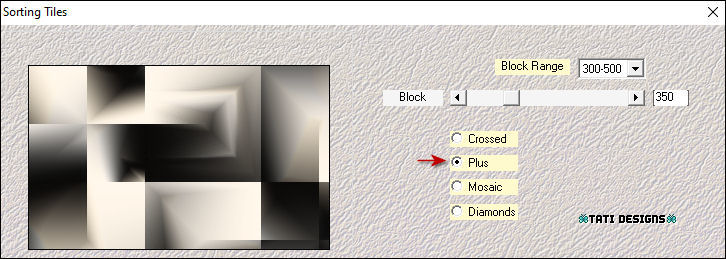
≈ Step 5 ≈
Effects / Plugins / Mehdi / Sorting Tiles:
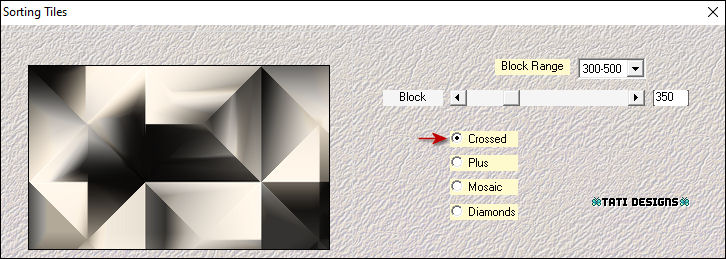
≈ Step 6 ≈
Effects / Plugins / Simple / 4 Way Average:

≈ Step 7 ≈
Layers / New Raster Layer and fill with the color (1) #e5dfd8 
≈ Step 8 ≈
Open the mask "Mask1_AmparoSilva" and return to your work.
≈ Step 9 ≈
Layers / New Mask Layer / Fron Image:
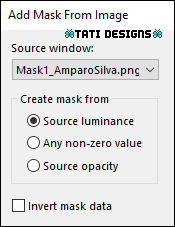
Layers / Merge / Merge Group.
≈ Step 10 ≈
Activate Tool "Pick" (K) and modify the positions of X (179,00) and Y (0,00):

Press the "M" key to deactivate the "Pick" Tool.
≈ Step 11 ≈
Effects / Plugins / Italian Editors Effect / Effeto Fantasma:

≈ Step 12 ≈
Effects / Texture Effects / Blinds:

≈ Step 13 ≈
Change the Blend Mode to "Overlay".
≈ Step 14 ≈
Activate the Bottom Layer ("Raster 1").
≈ Step 15 ≈
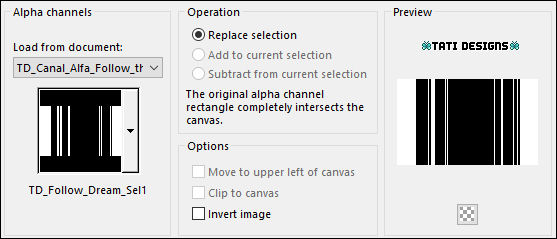
Selections / Load/Save selecction /Load Selection from Alpha Channel.
You will see that the selection is directly available "TD_Follow_Dream_Sel1", click to "Load":
≈ Step 16 ≈
Selections / Promote Selection to Layer.
≈ Step 17 ≈
Selections / Select None.
≈ Step 18 ≈
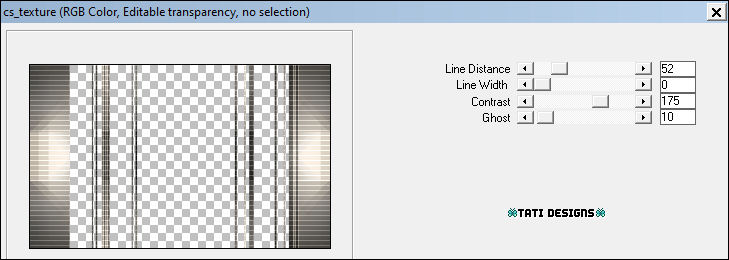
Effects / Plugins / Carolaine and Sensibility / cs_texture (default):
≈ Step 19 ≈
Activate the Bottom Layer ("Raster 1").
≈ Step 20 ≈
Layers / Duplicate.
≈ Step 21 ≈
Effects / Plugins / Mock / Windo (default):

≈ Step 22 ≈
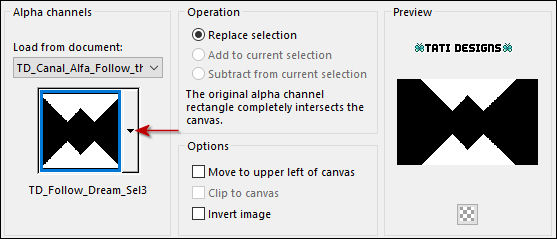
Selections / Load/Save selecction /Load Selection from Alpha Channel.
Show the menu and choose "TD_Follow_Dream_Sel3", click to "Load":
≈ Step 23 ≈
Press the "Delete" key on your keyboard.
≈ Step 24 ≈
Selections / Select None.
≈ Step 25 ≈
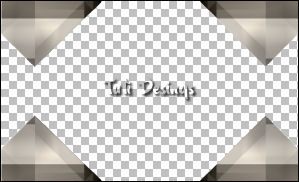
Effects / Plugins / Simple / Left Right Wrap:
≈ Step 26 ≈
Change the Blend Mode to "Overlay".
≈ Step 27 ≈
Activate the Bottom Layer ("Raster 1").
≈ Step 28 ≈
Activate "Selection" Tool (S) and click on "Custom Selection":

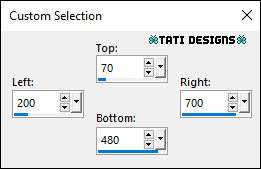
≈ Step 29 ≈
Selections / Promote Selection to Layer.
≈ Step 30 ≈
Effects / Plugins / Italian Editors Effect / Effeto Fantasma (default):

≈ Step 31 ≈
Selections / Select None.
≈ Step 32 ≈
Activate the Top Layer ("Group - Raster 2").
≈ Step 33 ≈
Layers / New Raster Layer.
≈ Step 34 ≈
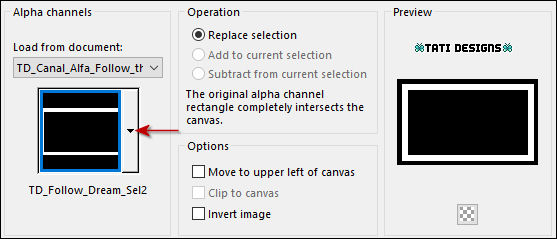
Selections / Load/Save selecction /Load Selection from Alpha Channel.
Show the menu and choose "TD_Follow_Dream_Sel2", click to "Load":
≈ Step 35 ≈
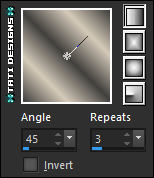
Fill the selection with the following gradient:
Foregroundcolor (3) #41403e 
Backgroundcolor (2) #d5cab9 
≈ Step 36 ≈
Effects / Plugins / AFS Import / Sqborder2 (default):

≈ Step 37 ≈
Selections / Select None.
≈ Step 38 ≈
Effects / 3D Effects / Drop Shadow: 0 / 0 / 50 / 10 / Color: (3) #41403e 
≈ Step 39 ≈
Layers / New Raster Layer and fill with the color (3) #41403e 
≈ Step 40 ≈
Open the mask "Mask2_AmparoSilva" and return to your work.
≈ Step 41 ≈
Layers / New Mask Layer / Fron Image:
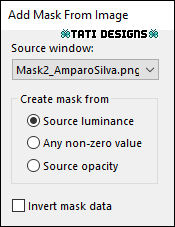
Layers / Merge / Merge Group.
≈ Step 42 ≈
Effects / Plugins / AP [Lines] / Lines - Silverlining:

≈ Step 43 ≈
Open the tube "TD_Tube_Ferran Calderon" and copy.
Return to your work and paste as new layer.
No need move.
≈ Step 44 ≈
Selections / Load/Save selecction /Load Selection from Alpha Channel.
Show the menu and choose "TD_Follow_Dream_Sel4", click to "Load":
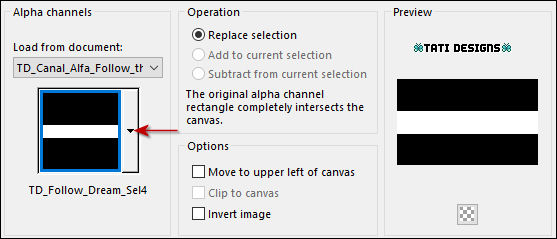
≈ Step 45 ≈
Activate "Flood Fill" (F) Tool and lower the Opacity to 50:

≈ Step 46 ≈
Layers / New Raster Layer and fill the selection with the color (1) #e5dfd8 
Reset the Opacity of the "Flood Fill" to 100.
≈ Step 47 ≈
Selections / Select None.
≈ Step 48 ≈
Effects / Plugins / MuRa's Seamless / Emboss at Alpha (default):

≈ Step 49 ≈
Selections / Load/Save selecction /Load Selection from Alpha Channel.
Show the menu and choose "TD_Follow_Dream_Sel5", click to "Load":
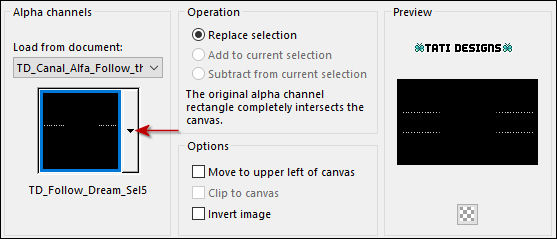
≈ Step 50 ≈
Activate "Flood Fill" (F) Tool and change the Match Mode setting to "None":

This will fill in all the selections with a single click.
≈ Step 51 ≈
Layers / New Raster Layer and fill the selection with the color #ffffff 
≈ Step 52 ≈
Selections / Select None.
≈ Step 53 ≈
Open the tube "TD_Texto_Follow_that_Dream" and copy.
Return to your work and paste as new layer.
No need move.
≈ Step 54 ≈
Lower the Opacity to 70.
≈ Step 55 ≈
Open the tube "TD_Titulo_Follow_that_Dream" and copy.
Return to your work and paste as new layer.
≈ Step 56 ≈
Activate Tool "Pick" (K) and modify the positions of X (168,00) and Y (486,00):

Press the "M" key to deactivate the "Pick" Tool.
≈ Step 57 ≈
Image / Add Borders / Symmetric - 1 pixel / Color: (4) #221f1c 
Image / Add Borders / Symmetric - 3 pixels / Color: (3) #41403e 
Image / Add Borders / Symmetric - 1 pixel / Color: (4) #221f1c 
Image / Add Borders / Symmetric - 15 pixels / Color: #ffffff 
Image / Add Borders / Symmetric - 1 pixel / Color: (4) #221f1c 
Image / Add Borders / Symmetric - 5 pixels / Color: (3) #41403e 
Image / Add Borders / Symmetric - 1 pixel / Color: (4) #221f1c 
Image / Add Borders / Symmetric - 45 pixels / Color: #ffffff 
≈ Step 58 ≈
Open the tube "TD_Deco_Follow_that_Dream" and copy.
Return to your work and paste as new layer.
≈ Step 59 ≈
Activate Tool "Pick" (K) and modify the positions of X (20,00) and Y (21,00):

Press the "M" key to deactivate the "Pick" Tool.
≈ Step 60 ≈
Layers / Duplicate. - Image / Mirror. -
Image / Flip.
≈ Step 61 ≈
Layers / New Raster Layer and add your name or watermark.
≈ Step 62 ≈
Image / Add Borders / Symmetric - 1 pixel / Color: (4) #221f1c 
≈ Step 63 ≈
Image / Resize: Width 950 pixels ("Resize All Layers" - Checked).
≈ Step 64 ≈
Export your work as an optimized .jpg file.
It's over!
I hope you liked it and enjoyed it.

.:. Another version of the tutorial with a tube by me .:.
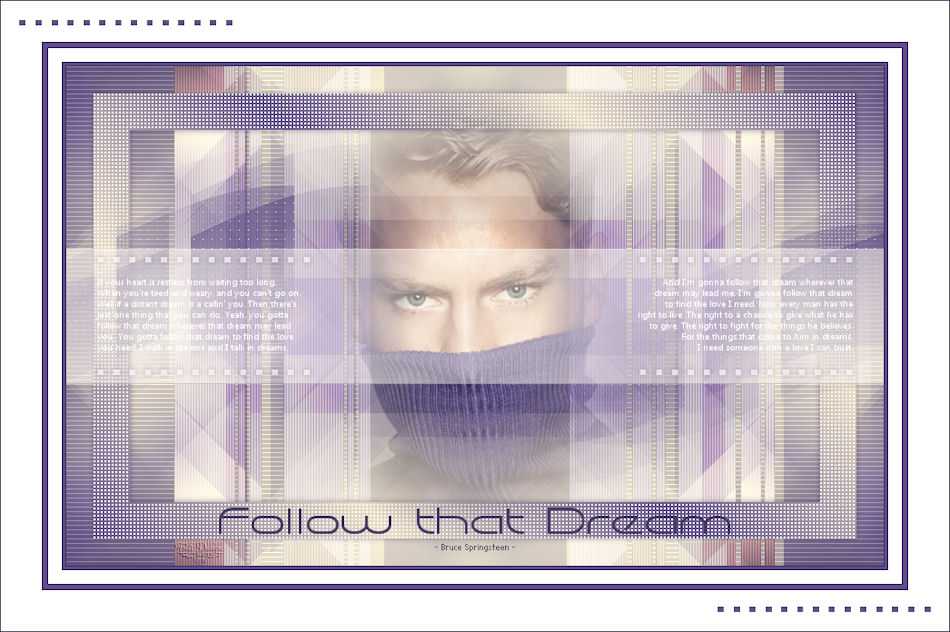

.:. If you want to send me your work with the result of this tutorial contact me .:.

 .:. Here you can see other versions of the tutorial .:.
